Skip to content
MEXORCABINETS & COUNTERTOPS LLC
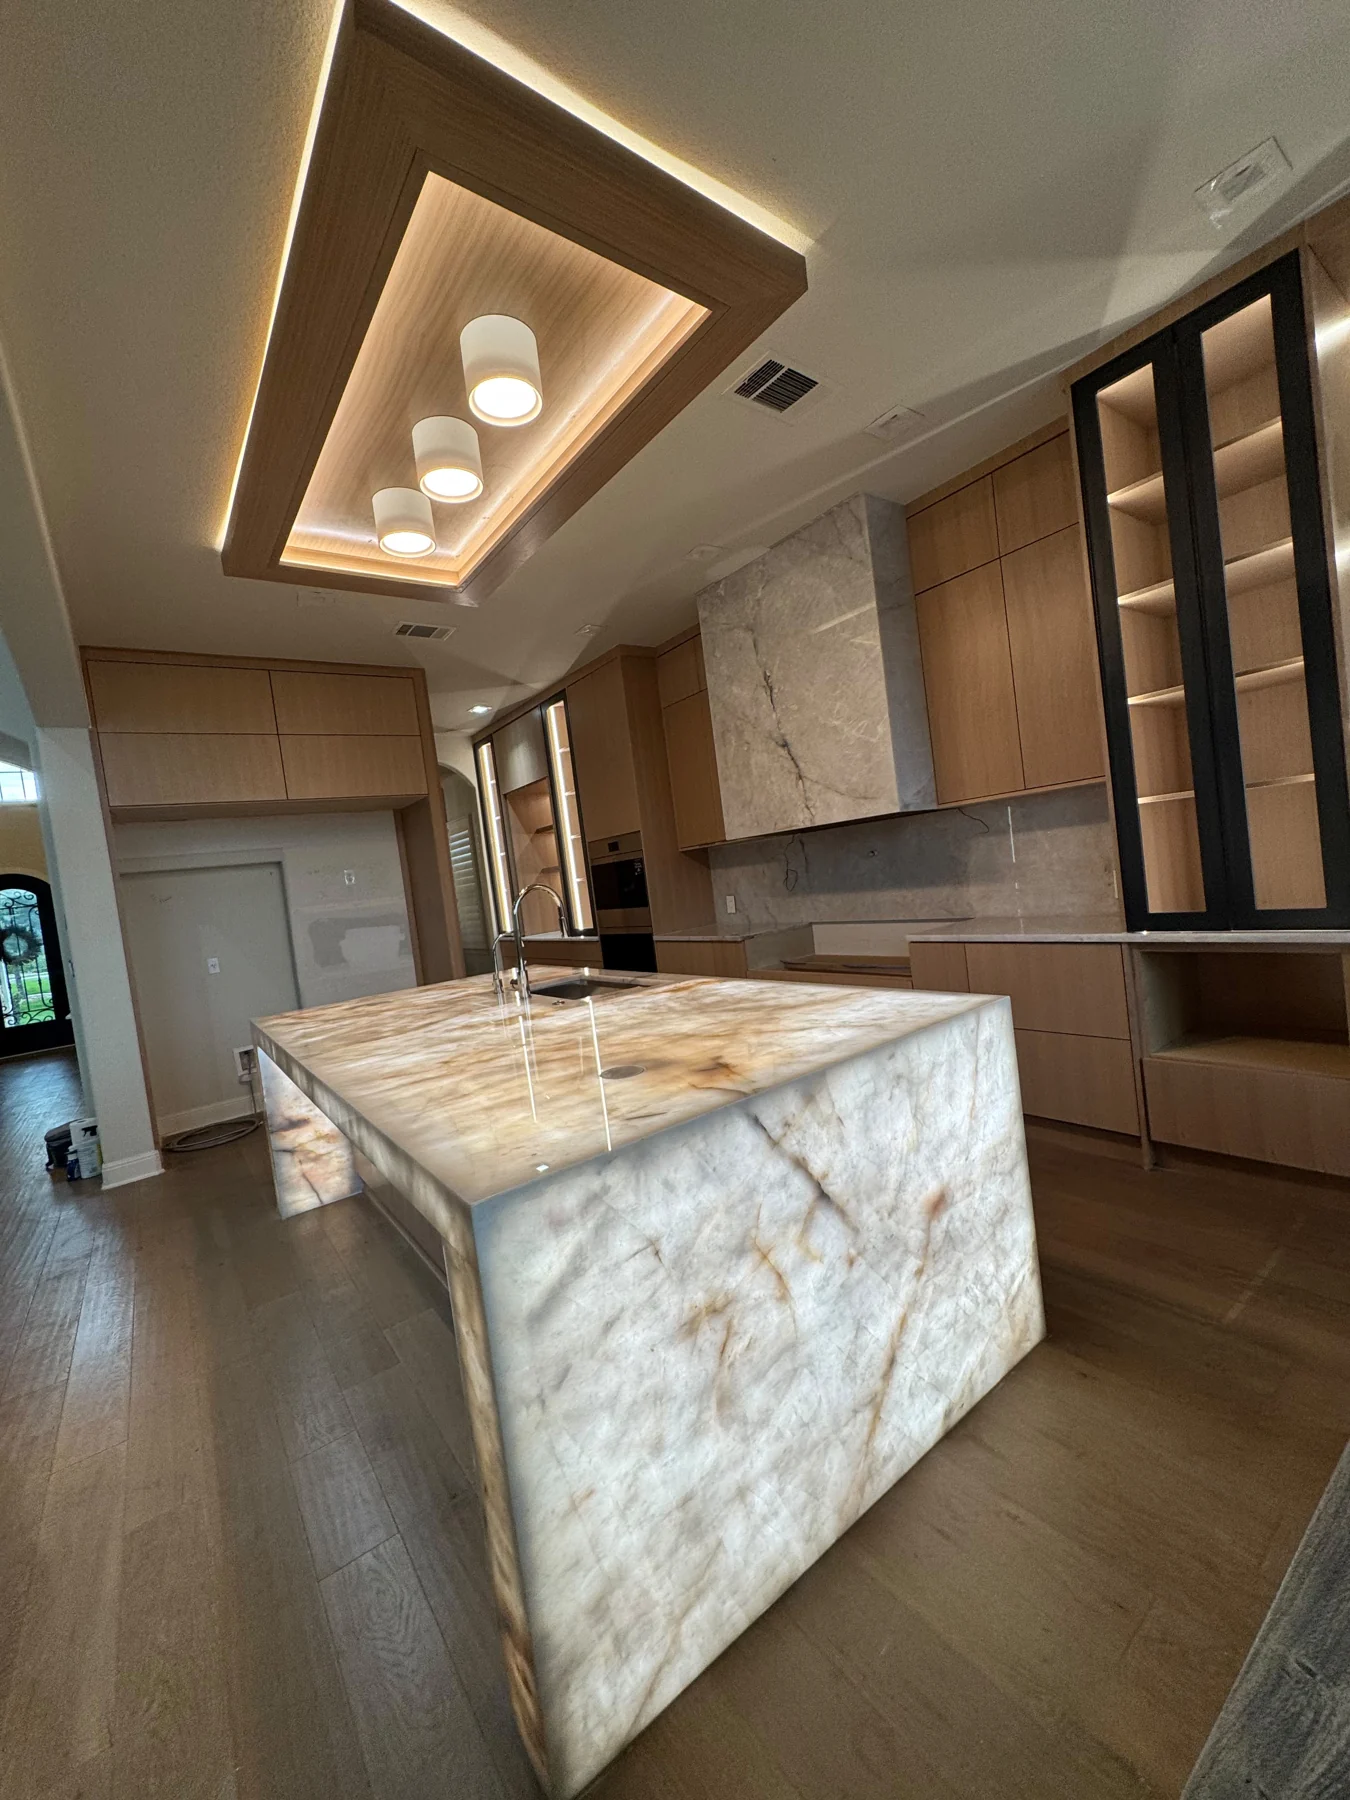
Warm wood-tone kitchen cabinetry with an illuminated waterfall-edge island and dark-framed display cabinets.

Project studies / San Antonio & surrounding areas

Before & after.
The details behind a transformation.

Explore installed Mexor project details and learn what planning a similar cabinetry and countertop transformation can involve. Matching before photos are not yet available.

Discuss a similar project
Serving San Antonio and surrounding areas(210) 982-2546

One coordinated project

An island. A pantry.
A place to display.

The photographs below show three connected areas of one project. They are not different stages of a before-and-after comparison.

Every project photo on this website shows actual work completed by Mexor Cabinets & Countertops LLC.

These photos show installed Mexor cabinetry, countertops and storage details. Matching before photos are not available for the projects shown, so this gallery does not present side-by-side before-and-after comparisons.

Warm wood-tone kitchen cabinetry with an illuminated waterfall-edge island and dark-framed display cabinets.

Kitchen / installed details

Installed kitchen details. Some appliance openings and surrounding finish work remain visible in this photo set.

01 / Kitchen

Warm wood cabinetry and an illuminated island

What the photograph shows

Warm wood-tone cabinetry surrounds a veined island with illuminated surfaces and waterfall ends. Dark-framed glass display cabinets and lighted shelves add contrast, while the sink is built into the island. The cabinetry, countertop and display lighting work together as a coordinated design.

Planning a similar transformation

A project with these features typically starts with room measurements, appliance specifications and a cabinet layout. The next decisions include surface selection, island support, sink cutouts, edge details and lighting access. Cabinet installation, countertop templating and fabrication, and electrical coordination need to follow an agreed sequence.

Ask about these details
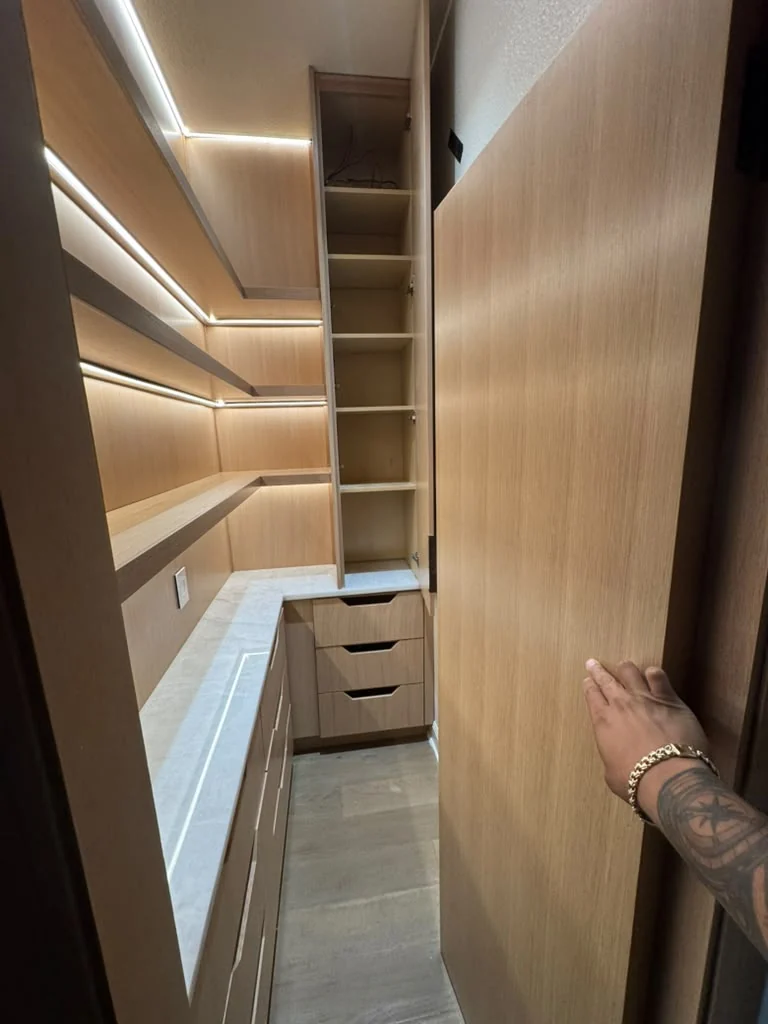
Wood-tone walk-in pantry with illuminated wraparound shelves, a pale countertop and lower drawers.

Pantry / installed details

Installed pantry details from the same project as the kitchen.

02 / Pantry

Storage coordinated with the kitchen

What the photograph shows

The pantry continues the kitchen’s wood-tone finish with wraparound open shelves, integrated shelf lighting, a pale countertop and lower drawers. A tall, narrow cabinet adds vertical storage at the end of the room.

Planning a similar transformation

Planning this type of pantry means matching shelf depth and spacing to what the household stores, keeping the walkway usable, and choosing which items belong in drawers or on open shelves. Countertop measurements and lighting routes should be coordinated before installation.

Ask about these details
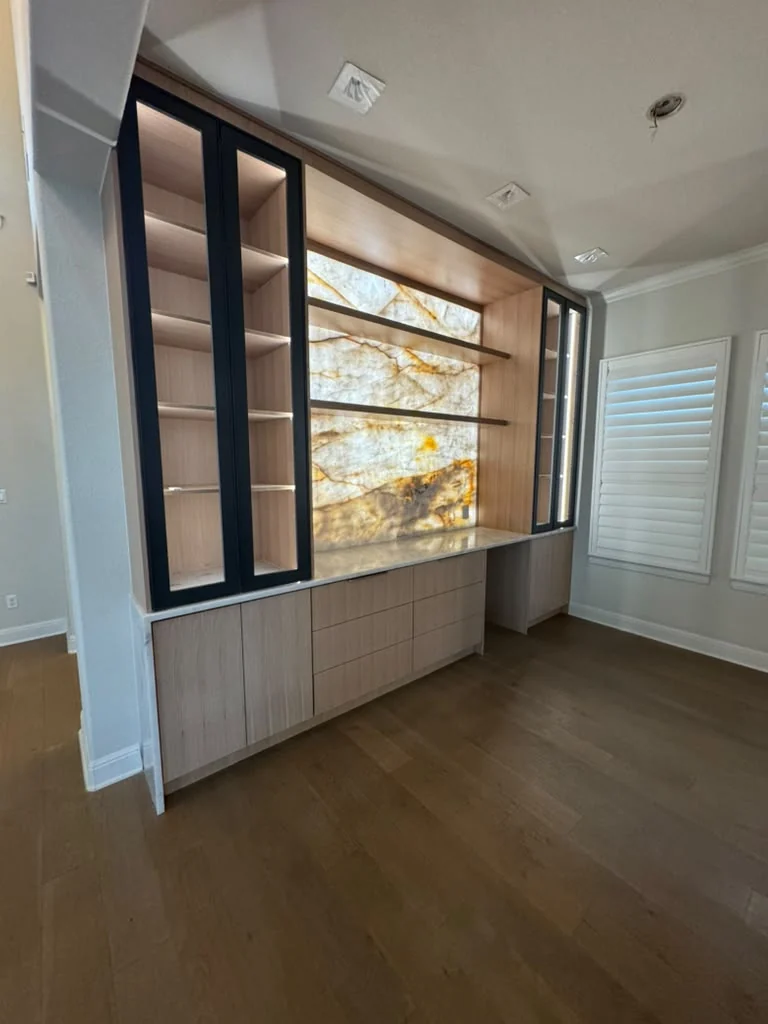
Wood-tone built-in display wall with a backlit veined panel, open shelves and dark-framed glass cabinets.

Display wall / installed details

Installed display-wall details from the same project. The photo also shows unfinished surrounding ceiling details.

03 / Display wall

A focal point with a practical side

What the photograph shows

A glowing veined feature panel forms the center of this built-in display wall. Open shelves sit between dark-framed glass cabinets, with wood-tone drawers and closed storage below. The lighting highlights the surface pattern and gives the cabinetry a strong focal point.

Planning a similar transformation

A similar built-in calls for careful wall measurements, shelf and cabinet proportions, surface support, and access to lighting components. Finish selection, fabrication and installation should be coordinated so the cabinet lines and illuminated feature fit together.

Ask about these details

More of the same space

Two more perspectives.

Different angles of the same installed kitchen. Neither image is a before photograph.

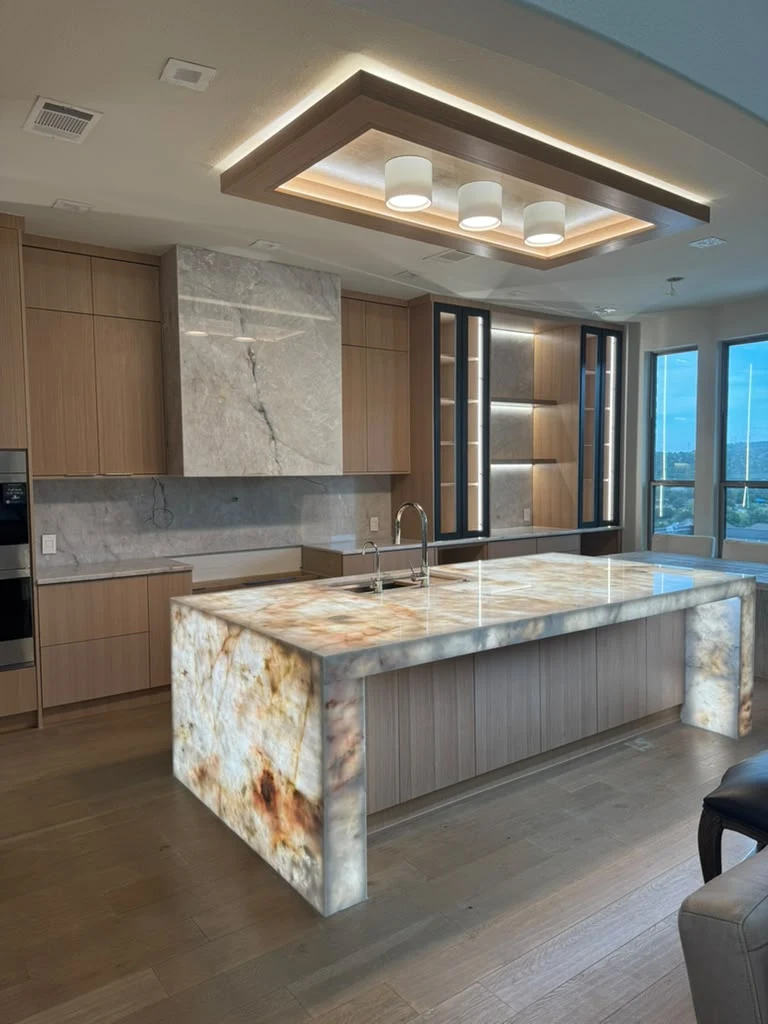
Close view of the illuminated waterfall island, sink and wood-tone kitchen cabinets, with appliance openings visible.

Island & ceiling detail

A closer view of the illuminated surfaces, sink and cabinetry.

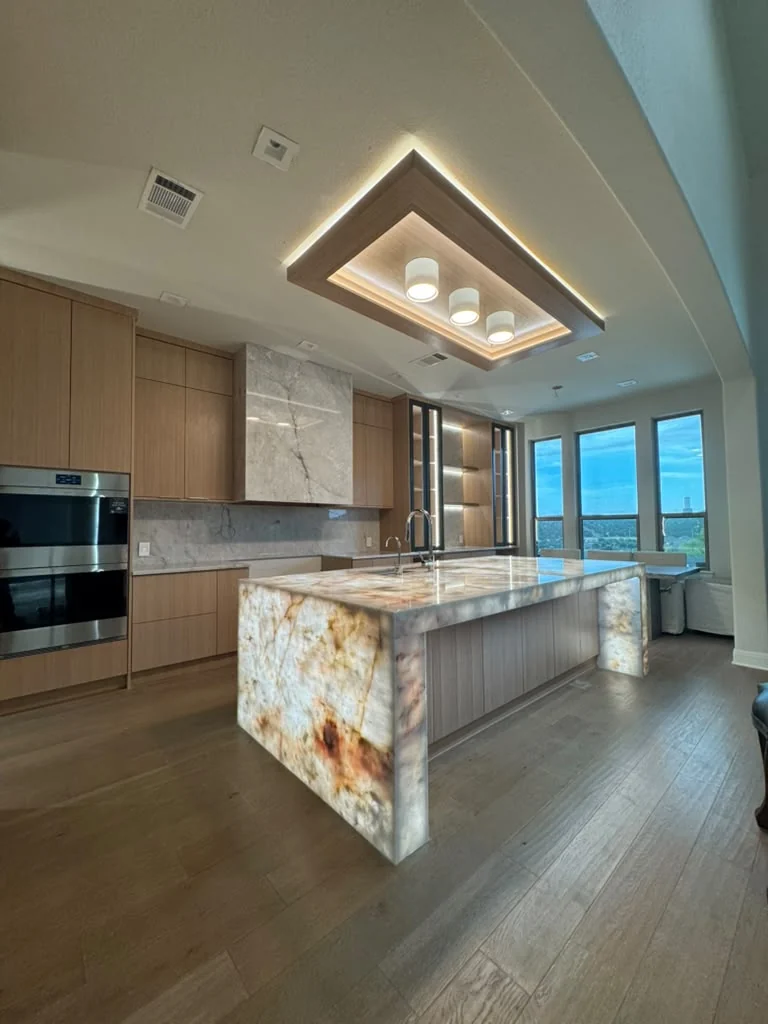
Wider view of the same kitchen, showing the illuminated island, wood-tone cabinetry and ceiling feature.

The wider room

The same kitchen viewed with more of its cabinetry and ceiling feature in frame.

The descriptions above distinguish visible features from general planning guidance. They do not establish the original room condition, exact material, scope of demolition, project location, cost or completion time.

A practical planning guide

What a transformation can involve.

This is a general overview. The actual work and sequence depend on the room, selected products and agreed project scope.

01

Document the starting point

Photograph the existing room from several angles and note what works, what does not and what you want to keep. Before photos are most useful when later images use the same viewpoints.

02

Measure & map the room

Record room dimensions, door and window locations, appliance specifications and existing service locations. Discuss clearances, cabinet access and how people move through the space.

03

Coordinate the selections

Consider cabinets, surfaces, hardware, lighting and nearby finishes as one scheme. Review proposed products and care requirements, then confirm which details belong in the scope.

04

Plan site preparation

If removal or changes to existing services are needed, agree on responsibilities and sequence. Existing conditions may affect the plan; photographs alone cannot establish what is behind a wall or cabinet.

05

Fit cabinets & surfaces

A typical sequence coordinates cabinet installation with final countertop measurements, fabrication and fitting. Sink, appliance, support and lighting details need to be resolved for the chosen design.

06

Review the finished details

An agreed final review can cover fit, alignment, doors, drawers and surface details. Keep product care information and final project photos together for reference.

Questions, answered

About the project photos.

Have a question about your own space? Tell us what you are planning and where the project is located.

Ask about your project
Where are the before photographs?

Matching before photos are not available for the projects shown. We present the installed details honestly and do not label another angle, another room or an unrelated photo as a before image.

Are these all separate projects?

No. The kitchen, pantry and display wall featured on this page are connected areas of one project. The three kitchen photographs show different views of the same space.

Can I recreate a detail shown here?

Tell Mexor which feature you like and share your own room details. A similar look may require different dimensions, materials, support or lighting. Feasibility and scope need to be confirmed for your project.

What should I photograph before my project?

Capture wide views from each corner, close views of existing cabinets and surfaces, and door, window and appliance locations. Use the same viewpoints after the work to make an accurate comparison.

Your next chapter

Your starting point comes first.

Tell us what you would like to change. Mexor serves San Antonio and surrounding areas, with project details discussed for your own space.

Start your project